Saturday, June 29, 2013

Of Icons, Babies and Road Trips

Some married girls work on home improvement projects when they have free time in the summer.

Others take a family vacation to Disney World, or take a cruise or stuff the family into a car for a road trip.

Some vegetate on a couch or bravely try to entertain their all - too - often bored children while counting down to the beginning of the next school year.

I, on the other hand, take a traditional icon painting class in Seattle at a prestigious art academy after MUCH research to hunt down a decent intensive art course. The training is done under a traveling icon painting master using natural earth pigments suspended in egg tempera with a challenging side of 24 karat gold leafing. The techniques we learn during this date back to the Byzantine era and the most famous icons painted derive from the Greek Orthodox and Russian Orthodox Church.

While I do this for 6 glorious days, The Husband rides solo on one of his beloved vintage Harleys through Colorado, New Mexico and a little bit of Utah.

Why the crazy trips solo you ask? 

Well, because we are treating this as our LAST summer of child -free freedom. 

We are hoping to become pregnant with our own kiddo this year (hopefully soon) and begin our own little branch of the family tree. 

Time to finally "grow up" for the 2 of us you could say. :) Prior to this week we did actually travel together on a huge trip to South Dakota to enjoy the Black Hills while I painted at a watercolor workshop and he fished and rode his bike. Then we headed to the other side of the state for his family reunion taking in even more of the beauty of the Black Hills and The Badlands along the way.

It is a strange but joyous feeling when one not only feels they have met the right person to marry and then does marry but even more strange and more joyous to know you both know you are ready to start a family with that person. Scary too yes, but a good feeling.....hence one last "hoo-rah" this summer.

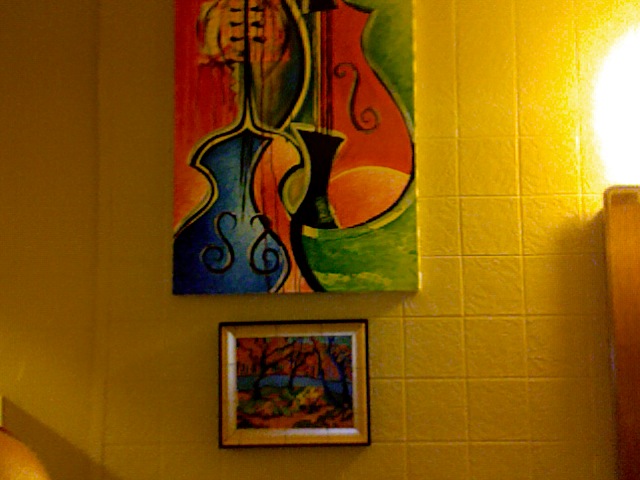
On to the icon for a bit:

 
This is the traditional method icon I finished June 29th. This photo was taken at 10 a.m. when I was 22 hours into the layering on the icon on Thursday, June 27th, the 4th day of the workshop. I did this first training in icon painting under Irene Perez - Omer. She trained under an icon master from Russia over the course of 7 years. The ironic thing is that I came all the way to Seattle to train with her and she just announced she has 4 other workshops newly scheduled in Texas within the next 6 months! 2 in Houston at the Episcopal Cathedral downtown, 1 in San Antonio and 1 in Austin. I am TOTALLY doing this again with her and luckily it will be a different icon we will be working on.

One thing to know about traditional icon painting is that you do not rush. It is not only an art form but it is also meditative and contemplative....you are not trying to just copy something or take sort cuts. This is BY FAR THE MOST challenging art form I have done ever because of the egg tempera. You have to grind the pigments into a fine powder (taking extreme caution because many of them are highly toxic) or and pre - ground powders to the egg yolk and dry white wine solution. Some egg tempera paints go on smoothly but only in thin layers, some smooth in heavy puddles and many can not be touched for at least 20 minutes while a thin layer is applied or it will lift off the surface and any layers below. Quite aggravating. All other kinds of paint along with pencil and colored pencil are easy to me. This is challenging which is EXACTLY what I wanted and needed. 
Here is my completed one in the photo below:
 

9''x11'' birch panel wrapped in linen and layered with 12 coats of sanded, hand made gesso (animal hide glue, marble dust and chalk). Painted with multiple "floats" of egg tempera and earth pigments along with detailed layers of earth pigmented egg tempera, bole red clay and 24 kt. gold leaf. Roughly 47 hours of work time in the finished icon.
We put in between 45 to 50 hours (depends on the student) of work for our icons to be successful by the end of class June 29th.


A few other tidbits:

The gold you see in the halos was done by me the 2nd day of the workshop and took between 2 to 2 and a half hours. You have to lean over the icon and have your lips half and inch to the surface you need to warm with your breath. You exhale warm air over it and hold the paper with the gold leaf on it in one hand and a piece of tissue paper in the other (the tissue paper acts like a fence and directs the warm breath over the desired spot of clay ). Once you think it has reached the right warmth and humidity you press the gold leaf on with its' paper and rub with the tissue paper. Then you use a special brush to remove excess flakes.
 

In icon painting the gold leaf is preferably 23 or 24 kt. gold (this is 24) and applied using only the human breath (you are breathing "life" into the icon) directly over the "bole" which is the red clay we painted onto the board ahead of time (the bole is ground by us and then animal hide glue, water and honey are mixed into it in order to paint with it). 

What I was contemplating while working:

1.) Children. Hoping to have them and raise them well.
Really well.  
Even if you aren't religious, I think that if you are working for hours on an image of Mary and the infant Jesus in such a tender moment, you can't help but think about all of that love :)

2.) Being grateful in the fact that The Husband has said time and time again that he doesn't care if we make all our own children, have one or two and adopt one or adopt all of them, he'd love them the same and can't wait to be a parent with me.
3.)How much my life and The Husbands' life has changed this past year.....for the better :)
4.) How the icon forced you to focus, work on a goal, overcome your anxieties (a.e. "I'm going to look like I don't know how to paint or draw if I screw this icon up", etc.) and, well, pray a little more.
5.) Other personal goals :)

That's just the tip of the iceberg. This was seriously one of the BEST things I have done in my life so far. I know some look at it as a painting and a lot of people don't really understand its' meaning or even think it is attractive, but we live in a world where everything is on demand and we don't know what patience is anymore. If we don't see results right away we throw in the towel and look for something better or easier or more attractive.

Many things help me refocus in life: 
encouragement from my family (especially my sister who is extremely goal driven), my husband and other friends. It was, however,  great to find such a unique and, well, beautiful way to focus and plan on the year ahead. 
 

Monday, June 10, 2013

Plant Progress!!!

Its' been a little over 2 weeks since I started the plant adventure on my patio. Everything is making good progress and I am even trying out growing potatoes!

I am happy to report that the herbs I have been growing are doing really well! I have been using the Orange Mint in teas and other beverages that have also included lemon. 
The Sage, Rosemary and Sweet Basil have been in several dishes the past week and it has made a huge difference in the kitchen. 
I also found a great recipe for a Rosemary hair rinse and whipped up a batch to use the other day. I am happy to report it is amazing. Rosemary puts "life" back into your hair by adding extra shine AND it makes your hair smell wonderful. 
*More to come on my hair adventures soon in another post.*
I don't have photos of the progress of my herbs right now because this post is dedicated on nerding - out on my vegetable plants:

SPUDS!... Well, teeny, tiny ones. I saw on t.v. and online how to start potatoes so I thought I would try it. I removed 6 chunks with "eyes" out of a potato I had researched would do well for this part of Texas and planted them in soil and a giant 16 inch deep by 32" planter. The green spots you see on the left side of the pink quartz crystal are spud buds growing out of the soil! I checked the other 5 and they are progressing well too.

SEXY string bean plants. These guys have grown over 4'' since I planted them a little over 2 weeks ago, started flowering and TODAY I noticed numerous tiny string beans popping out! The beans are 1'' to 2'' so far. I can't wait to see more!

One of the lovely "baby" beans near the center of this photo. Its' 2'' long! SO CUTE!
This is a shot of the "garden" so far on the patio. The white planter in the center is my potato planter for now. Including the herbs and flowering ornamental plants, I have 11 different plants growing in my container garden.


CUCUMBERS! These 4 starter plants are in my other 16 inch deep by 32" long planter for now and have already started blooming! They too have grown nearly 4'' since I planted them a little over a week ago.

The flowers (Lantana)that sort of died a week ago from drowning. The Husband said it was because of not enough H2O, but Lantana is supposed to be drought tolerant, so I am confused. Two have come back to life and the other 2 sadly didn't make it and will be composted:(

PLANTERS all up in ya face!
Window boxes I got practically for a steal near Glen Rose, TX a week ago. I got 6 of them and The Husband is going to have to modify them so they work under the windows without tilting down too much. 4 of these will be for plants that only need partial sunlight and the other 2 will be for plants that need full sun. I plan on planting edible and ornamental goodies in these when I get back in 2 and a half weeks from SoDak and Seattle. I have been researching some options and am really excited. If YOU have some ideas or suggestion, PLEASE comment them to me.


Hanging baskets also found on sale. There are 8 of them around the perimeter of the patio and I am still researching ideas.

Please, If you have ideas for what I should pant in these beauties, PLEASE message me via comments on my blog. Planting in these will start the first or 2nd week of July when I am back in Texas.

OTHER NOTES:
If the container garden stays fairly successful through June and July I plan on expanding it further with more containers and some other plants that are edible and some that are just ornamental. I also plan on turning a few irregular items into planters and I'll have a post on that too!
That also gives me and The Husband time to plan a few small raised beds near my studio and go from there. I get really ambitious with projects like these and tend to get impatient. 
Its' a flaw I am working on changing. :)
Starting the small container garden first with simple plants has been a good way for my pace myself, tone down my impatient tendencies, conserve time, energy and money instead of dive into a huge garden build - and - plant project.

Wednesday, June 5, 2013

30 Minute Bathroom Mini - Makeover

Ever had a room (or three) in your house that just depresses you? 

You like the room, you know it has potential and you have GRAND schemes to transform it one day.

But, you have NO money for any major remodeling ANYTIME soon.

Your husband or partner is sick of projects or just plain busy.

So, what is a gal or decorating savvy guy to do? 
Wait forever for the money or the partner to have time?

.....Well, this gal took stock of the "free" stuff in her house and then trucked it on over to the dollar store and prowled around with some colors in mind.

Here is what ensued when I got home and The Husband is very happy with the results:


The tiling job is ultra rad (thank you Husband) and super cheap (tile scraps from our new master bath), but this bathroom was pretty depressing and sadly vanilla in color. This photo and the one right after are the two "BEFORE" pictures. The ones that follow are the much happier "AFTER" pictures. 

Eventually, the sad 1970's vanilla "particle - board - made - to - look - like - tile" on the walls as well as the ceiling with old minor water damage and random shelf built - ins directly behind the bathroom door will be GUTTED out like a fish (sorry vegan readers) and replaced with simple, sleek and frugal materials. Until then, my 30 minute make - over that cost all of $20 will have to do. But, its' so much happier in there now! YEEHAW!
 $1 silver metallic owl bank/figurine to brighten the corner partnered with blue hand soap, a blue ceramic jar I made in college and a blue bottle of perfume. So, this area cost all of $1 to make over.

 This is the really odd "custom" shelving area built in right behind the bathroom door by the previous owners in the 1970's complete with faux - marble printed mirror in the back. I dusted the shelves and removed the odds and ends. The very top shelf (you only see the lowest portion of that shelf in this photo...sorry) now has neatly folded blankets for guests and a blue ceramic jar for other storage and decoration I made in college. The second shelf has a basket made of sea grass I bought 5 years ago at a sale for a $1. It has queen sized sheets for guests in it. The silver item on the right is an awesome blown glass candle holder to give the area some oomf and to hold a candle for use near the tub for bubble bath time! The bottom shelf has another basket ($1) with guest goodies and two more candle holders that brighten the spot and can also be moved over to the tiled seat behind the tub for, you guessed it, bubble bath time

This photo does look a little dark, but the colors on the shower curtain are actually quite bright and cheerful. They are orange, turquoise, green, pink and red and the clear curtain is layered over an opaque white one bought a few months ago for about $5 (Dolla Sto'!) for more privacy. You never know when one guest might want to shower while the other wants to sneak in to use the toilet. Both folks will have privacy. :)


Shot of above toilet area. The towel brings out the orange in the curtains. It was a free towel because it accidentally got stolen from my parents house a long time ago.


But, doesn't it look festive AND go great with the things I hung on the wall?

By the way, this shower curtain was fume - free and made of recycled materials, so no funky smells in the bathroom from shower curtains for days on end.

 
My camera on my computer doesn't always take great shots, but that is one of my paintings (so, no cost) I taught people how to paint 2 months ago at the "drink and paint" things I teach at. The blues go with the shower curtain, the turquoise carpeted accessories and the blue items on the counter.


These are the lusciously turquoise and CHEAP items that started this whole mini - cheap - makeover today. Dollar General, $10 for the set and brings out the turquoise in the $8 shower curtain.


The photo to the right and the next 2 are shots of the freebies I decorated the once sad bathroom with. They are all art pieces I made in the last 2 months at workshops I taught or are things I made previously.
 These are paintings I made. Again, I "stole" them from other parts of the house decorate the once boring area above the toilet and other parts of the bathroom.


The glass items were thrift store finds years ago for $1 to $4 and the mirrored tray propped up against the wall under some of the art in the final photo was free because it was my Great Aunt Mina's. The incense sticks in the tiny milk glass vase provide a nice scent in the bathroom even when not lit and are propped - up with a handful of dried chickpeas. The pheasant feathers in the tall blue vase were free too from my sister in law in South Dakota.
So, in closing, you can re - vamp a sad room AND keep yourself from just shutting the door to the room you are depressed about because you can't spend the bigger bucks and don't have the time to do a major makeover. 
Truth be told I did have extra paint in my studio and painters tape and easily could have painted all or part of the walls, shelves and cabinets. But, I wanted to stick low - stress methods and use what I had easily available and have a little fun with my tiny budget at the dollar store.
Let me know what you thought. Send me your comments please. :)


Sunday, June 2, 2013

Antique and Tchotskchy Collectin' Fool

My brother makes fun of my "collecting".

He is the ring leader and my sister and parents are his fellow "gang" members.

Mind you, this is all in fun.

I love stuff. Cool stuff. Antique stuff. Sometimes TACKY stuff. 

I will say I have collections and anytime I do this within earshot (I will refer to him as "N" in this post) N and the fellow "gang" members will laugh and be like "What is your NEWEST collection?". 

The Husband and I LIVE for antique stores but especially the low - brow seedier hole - in - the - wall types. We LOVE thrift stores, garage sales and flea markets. He is a MASTER of haggling with an almost Jedi - like prowess.

We are especially into anything from the 30's to early 60's in terms of furniture, knick - knacks/ tchotskchy's, clothing and jewelry (you've seen my ring right?). We only buy quality stuff, nothing broken or that could be subject to us saying "one day we'll have time to fix it" yadah, yadah, yadah.....

The Husband also uses his IPhone to aide in our "stuff" hunting efforts and especially the haggling.
Checking out Ebay and other sites when faced with a fierce store owner or flea market booth operator is a POWERFUL tool in mid - haggle. 

I recently got to hone my haggle skills without The Husband or his IPhone. We took a trip to the Dallas/ Fort Worth area the past few days due to one of his ropes - course training jobs. While he worked, I was given the credit card and a spending limit/ challenge. I scoured small antique and thrift stores and even haggled (and won BTW) against a rather racist shop owner. I stayed in the budget and here is some of the "loot". 
Check out tha collection bro:


Yellow - orange and metallic gold 1950's ashtray, $5. It is in perfect condition and because the cigarette divets are minute, this beauty is going to be a lovely "dish" on my coffee table.

"Genie Lamp - Looking" planter/vase - thing, $15. Burnt orange and gold and glorious! For now this is adorning the bookshelves of art books until I can plant something in it.

 LAVENDER AND GOLD LAMP!
Mid - 1950's with original "Jetson's" space - age looking lampshade, $25. It works and its' beautiful!
 Milk glass vase....how I love thee.....especially because I out - haggled the racist shop owner and got her down from $55 to $5. This lady assumed that because #1 I am white and that #2 no one else was in her store it was ok for her to share her views on ALL "black folks" to me in an epic monologue...awkward, random, I outsmarted her (go figure) and made out of that store like a bandit.
 1950's to early 1960's era aluminum cream and sugar server with tray, $1.

 The "Piece De Resistence" (?spelling?) Ceramic Bull and Bull Fighter Combo! A surprise for The Husband. We have a growing collection of bull fighter themed stuff including velvet paintings. This is all for his office in our house which also has his African mask collection and a slew of low - brow art. It is orange and metallic gold and was $16 total.
Action shot of "El Toro".....sense the fierceness of his PRICE!!!

Intense shot of Senor Bull Fighter :)

What sort of stuff "floats your boat"? What things have you haggled for or felt like you got a great deal on? DO SHARE!
....Also, feedback on my sublime finds are appreciated too :)

Apology for Untimely Post on Plants

Dear Blog Readers,

I am sorry I did not get to post the second part (SIGH) as promised of Part 2 (SIGH) of "Busy Husband Inspires Plant - A- Palooza". 

My accidentally bad photos of the planting and plants (these photos are better, trust me) + finding out my baby brother was able to visit from Germany + studying for another certification exam ='d bad timing for blog updates/ Part 2/ good photos to view.

SORRY :(

However, studying is going o.k., I was happy to see the bro and Phase 1 of the planting (Plant - A - Palooza) has gone well and the herbs are doing great! In a little over a week since I planted my first EVER container garden, all my plants have grown an inch to even 3 inches in size! The cucumbers go in tomorrow and I am hoping to revive the flowers that nearly died while I was out of town the past couple of days.

Let me know what you think of the progress so far! :)

Vesper, my "fur - baby" who "helps" in the new patio/ container garden. Don't let the innocent yellow - green eyes fool you. This Mama is a viscous hunter who LOVES to leave "presents" of the lizard or bird variety for me a little too often.

The plants that are sort - of dead right now. I think they will spruce back up. The weather attacked them while I was out of town :(

Sexiest. Bean plants. EVER. 
These are in 2 planters 14" long in a 
rectangular shape. Flowered buds have already started and I can't wait for beans!
The soil I used was a blended deep dark soil from the farm supply store. My plant really love it and tomorrow when the cucumbers go in I will be using some of the soil to start my window boxes and hanging baskets which will have some edible and ornimental plants in them.

Two pots of Thai Basil (with the purple flowers), a pot of Common Sage and a pot of Orange Mint. 
(8" across planters by the way) :)
 Because these planters are all plastic, I had to thuroughly wash them with hot water and soap and rinse like crazy. I would prefer ceramic or terra cotta planters, but they were not in this chicks' budget. Since they are plastic they had a really bad smell and I didn't want those fumes next to the soil and tender plants. Washing eliminated the fumes and if I would have used terra cotta planters, I would have needed to soak them first so they wouldn't suck the moisture from the soil.

I know this photo is sideways. Whoops. BUT, check out this Rosemary! It has already grown over 2 inches in one week! 
The pot is 8" across by the way in case you were wondering about size. 
I will be adding compost from my bin we started four months ago to the Rosemary and all my plants tomorrow. I can't wait to see how they will react!


Wednesday, May 22, 2013

Busy Husband Inspires Wife Plant - A - Palooza

My husband is a busy man. 

Not lawyer busy, minister busy, doctor busy, CEO busy,  (feel free to insert - stereotypical - busy - job - here - mentally, etc.) but busy.

When he isn't teaching full time at the outdoor magnate school program that hosts over 7,000 5th graders per year for one of THE largest school districts in America, he does side work training summer camp counselors to safely run ropes courses for the summer season ahead.

When that isn't happening, he's nursing and planting hundreds of trees, trading sand internationally on an online sand forum (seriously, its' a real forum that does exist and we have over 800 pounds of his "trade sand" and over 1500 samples of sand from around the world to prove it). 

He also is a biker. An old - school, Panhead Harley riding, tattooed, bearded and even BOOK - WRITING biker with a hint of biker snob. Trike style bikes and Gold Wing bikes make him snarl and the hint of snob appear. His book about his 3 month solo Panhead trip in the 90's from Texas to Alaska and all the way back was published. And, to top it off, he is the member of a wild group of vintage car/ hot rod lovers who actually BUILD their hot rods, resurrecting rusted model - t's, Studebakers, etc. and turning them into racing and stunning show - pieces. He is currently halfway thru building a '37 chopped Chevy hot rod truck of his own to go along with the 2 other vintage beauties we own.

It has been a busy year and a little rough to say the least. His father passed at 86 in August only a month and a half before our wedding. Also, the stress of adding onto what is now our house was intense. So, right now I just want him to have some fun with his own stuff for a while.

I know that as an AVID environmental ed guy, he wants to help me start a garden. However, I don't want to "throw one more thing" on his plate.

I want a garden bad..... a raised bed beauty with beautiful, edible goodness and some shade here and there. I really want one by the studio, but I figured I'd start small with a potted garden.

I can do this! 

Here's a shot of the delectable goodies:
The two on the far left are Thai Basil, middle front is Rosemary, middle back are Blue Bushel Green Beans, back right Greek Basil, front right Sweet Basil, and far right Orange Citrus Mint. Oh, and that's my arm in the photo too.

I got them at the local feed store. It was my first time in there. Six grown men tried to help me there because they knew it was my first time there. It was adorable. I felt like a celeb or something.

ANYWAY, the planting starts tomorrow. Photos will be taken and a blog about this will be written and posted by Friday :) Please check back!


Monday, May 20, 2013

Tackling the Studio Part 2

After this particular discussion (in part 1) of the studio and my problem with staying focused to organize and not just "play" in it, The Husband and I devised a plan.

We have two friends (a married couple) always looking for fun odd jobs for a little extra cash. G (the husband in the pair) does work on our acreage from time to time and helps The Husband with fun stuff in our four bay working garage. K (the wife) is a feisty, tiny thing loads of fun to talk to and amazing at organizing just about anything. She, unlike me, is great at staying focused and keeping people motivated whilst helping then dig through their stuff.

We called up G and K and told them the dilemna. A couple of days later they came over and surveyed the task ahead.

"Wow!", said K. "I've never seen so much art stuff in any place other than an art supply store. Whoa!".

"Yep. I've got some ideas but as you can see I can work out here but only in a small portion right now. I just need a little help to stay focused and an opinion on how to put things in places so that people who come in here other than me can find supplies and work." I said.

K and I helped G and The Husband go back through what was lurking in the two overhead lofts in the studio. All the Christmas stuff * and other things that had been stacked there in an effort to give them shelter quickly when I moved in where removed and sent into available space in the middle garage bay. Then, they could be relocated to our rent house on the other side of town until needed during the holidays. K and I went thru the containers and reorganized by separating items to keep and items to sell or donate.

(* Special note: Christmas is BEYOND huge on my side of the family. I mean, it was a big deal for my inlaws, but my Mom turns into Martha Stewart right before Thanksgiving and is totally in her holiday - decorating - element around two weeks before Thanksgiving and until around January 3rd - ish. My husband and his family had a nice tree and some great traditions that they still carry on today. My Mom not only does amazing decor, but at one point we had a 13 foot tree AND 3 to 4 other trees. I'll get into our other traditions in another post, but I want to give you a "picture" of where I got my Christmas stuff/ habits from. I am not complaining, and I love my 5 trees, over 400 Hallmark ornaments and 100+ glass ornaments, but to an outsider it looks like way too much Christmas goodness).

Then G and The Husband went to the house to start putting together a new (IKEA! Yay!) bed while K and I began going through boxes of art supplies, art books, portfolios of art work, etc. and tossing useless things whilst boxing donations and taking items in that really were supposed to be in the house. My husband and I own well over 100 pieces of art and some of it was in the studio. We plan on rotating the art in our home much like a gallery, so hauling in some treasures helped to get the rotating started :) Pics to come soon :)

After 20 hours of work over two different days, K and I have the studio 85% done. She is amazing. She'll help me with the last portion and then G and The Husband will put in the insulation paneling. The electrical is already wired and I have light fixtures picked out so working anywhere within the space will be well lit and comfortable for all.

Pics to come very soon of the space along with before and after pics. The next step is to start the mural on the outside of one side of the studio and get the ball rolling for me to host private lessons and workshops in that space for my art students. :)

Wednesday, May 15, 2013

Thanks for asking for photos! :)

Some of you out there have not only been reading my blog but actually sending me questions!

Thank you!

You have requested a photo of my simple but elegant engagement ring and wedding band. Also,  a picture of my studio that The Husband got me instead of a huge diamond at my request :) Diamonds are great but studio spaces are the best!


Tuesday, May 14, 2013

Tackling the Studio (Part 1)


As I "touched on" in my first few blogs, I am jobless.


Well, in the more traditional sense.

Not really by choice..... well, sort of. 

DON'T GET ME WRONG.....I'm not complaining. Things are pretty good: The Husband is pretty rad, our house is cool and the addition onto it has given us oodles more space, most of the people in our little weird town are friendly, we have a beautiful chunk of land, and I have an art studio space that is more than just a craft corner in my house or a converted storage room.

Most gals now days seem to still want the giant diamond when they get engaged. 

Why (you are probably asking) am I bringing up engagement rings whilst hinting at a studio building? 

Well, the reason is that when The Husband took me ring "browsing" on a trip to the small hill country town we later got married in he asked if I would like a big diamond OR a smaller diamond and a building to use as a studio when I would eventually move to his little piece of woods.

I have never been completely traditional and immediately said "studio" and chose a smaller and simpler *ring* with a matching band. 

The studio arrived on the acre of land nearest the house in April 2012. Coming in at roughly 300 square feet with one and a half stories of prefabricated wooden cabin goodness, a small porch, two loft spaces in the 1/2 stories and 5 windows throughout, I swooned at the possibilities ahead.

We started stuffing it with the 8 years of art goodies I had accumulated during my teaching career (thus far) and other things from the house I was getting ready to sell throughout the summer of 2012. I dubbed it "The Owls' Nest Studio" and started a tiny facebook page for it in August of 2012. 

For several months it was messy but usable but only by me. Trying to have more people out there was crazy and I knew the time was fast approaching to tackle the craziness and organize. 

Efforts began in March, then sadly stopped because I would just make art out there and not clean and organize. Then I started again in April and let my other class obligations in Huntsville (the large college town next to us about 20 miles away) suck away all my organizational energy. In late April The Husband interviened:

"Honey", he said one night over my latest crock pot experiment he was nicely nibbling on, "I've noticed you haulted the organizing you had started in the studio. I know it is a lot of stuff and overwhelming but you know you will be making great things once you finally have it clean and the way you have always wanted it. You are only able to really use one portion of it right now."

"I know", I said and poured another glass of wine for myself and cracked open a beer for him, "but I just love the space so much and the stuff so much and just get overwhelmed. Its' like I either start organizing then give up or get distracted and start just making a piece of art when I should be doing what really needs to be done."

*(My ring by the way is a swanky little art deco number from the 1930's that cost less than 1/10th of a standard wedding set today. It has less than 1/2 a carat of beautiful diamonds but is complete with white and yellow gold metal work....pics to come in the future).

Part 2 coming by May 20th.....yes for real.......


Wednesday, May 8, 2013

I'm FINALLY back!

I started an art website and finally got some evening art teaching gigs the same time I started this blog and thus fell into the rutt of not adding to my blog. I finally have my time managed better and have plenty of "juicy blog tidbits" to share.

Here is the Part 2 I promised. YES, it is HUGE, but before I add more posts you really gotta know my back story:)

In future posts I'll tackle some of these topics:

- adjusting to marriage 
- adjusting to small town life
- adventures living out in the deep woods
- starting a garden...FINALLY
- house wife madness 
- projects in my art studio (The Owls' Nest)
- family fun 
- silly musings 

Part 2:

My Prince Charmings'job(for now referred to in my blog as 'The Husband')brought me to where I am now, a town of 2,700 in East Texas. He's been here for nearly 22 years and was a transplanted farm boy from the far North Eastern corner of South Dakota of all places. He has owned and lived on 14 beautiful acres deep in the woods for 5 years and taught at the same magnate school program housed in the woods for nearly 22 years.

We met 3 years ago in November in the studio space I used to rent and work in in downtown Houston. He and the 2 people he came in with that night (a fabulous 40's style pin-up model gal named Miss V and a crazy dude named Scary Jerry with an INSANE beard) had been up all night the night before at a wake for a friend who had died in a motorcycle accident. In a no - sleep sudden burst of caffeinated energy they all 3 decided to head to the huge city - wide Art Crawl which started at the warehouse my studio was in. I thought they were hilarious and I became fast friends with all 3 of them and kept in touch about art events in the Houston area for several months before coming face to face with them again. 

By that February, Miss V invited me to sell some of my 40's style pin - up accessory creations at my own booth during the huge Houston area car show her husband was helping plan. She was secretly plotting to set up The Husband and I. 

It worked.

The Husband showed me around the car show after I closed my booth and we went to a great after party with his car club. The next morning, his  tattooed - bearded - eclectic - motor cycle riding - self picked me up from my hotel for Tex-Mex brunch and asked what I was doing 2 weeks later for my spring break.

"Nothing", I replied. "Get me outta Lake Jackson".

"Great", he said. "Pick anywhere in Texas you want to go".

I settled on Marfa and Big Bend in far West Texas and our first official date was a week long road trip adventure to those locales. We were a couple by the end of the trip and about 16 months later he proposed to me at Artists' Point in Yellowstone National Park in the middle of a three - week long camping adventure.

With the proposal came planning a wedding and along with help from my Dad, we had to prep my house I had bought on my own and lived in for 7 years for sale. I also had to make the tearful decision to leave my art teaching job I had had at the high school I had gone too and then worked in for 8 years. Of course I was going to miss most of my coworkers and a lot of my students, but the thing that upset me the most was knowing I might never get to teach art full time again. But, that's for a later blog...

We got married in October, got me moved in with him in his tiny bachelor pad in the woods, sold my house 2 weeks after the wedding and then finished the renovations to double the size of his pad and turn it into our pad for move in by the beginning of December. 

Also, during that time, tried to find any sort of art related paying work, put in paperwork to sub elementary school (the 'planet' inhabited by tiny people I had never taught before and usually cheerful female teachers I had never encountered before in high school planet), started this blog and my art website and have managed to stuff in time to TRY to learn the art of home management and house wife mad - organization - skills.

SO, I know I have written a lot, but ya gotta know me a little before I add to this blog. Thank you for reading! :)